1.구글 프로젝트 생성.

1) 구글 클라우드 플랫폼을 들어간다.
2) ▼를 누르고 새프로젝트 생성.
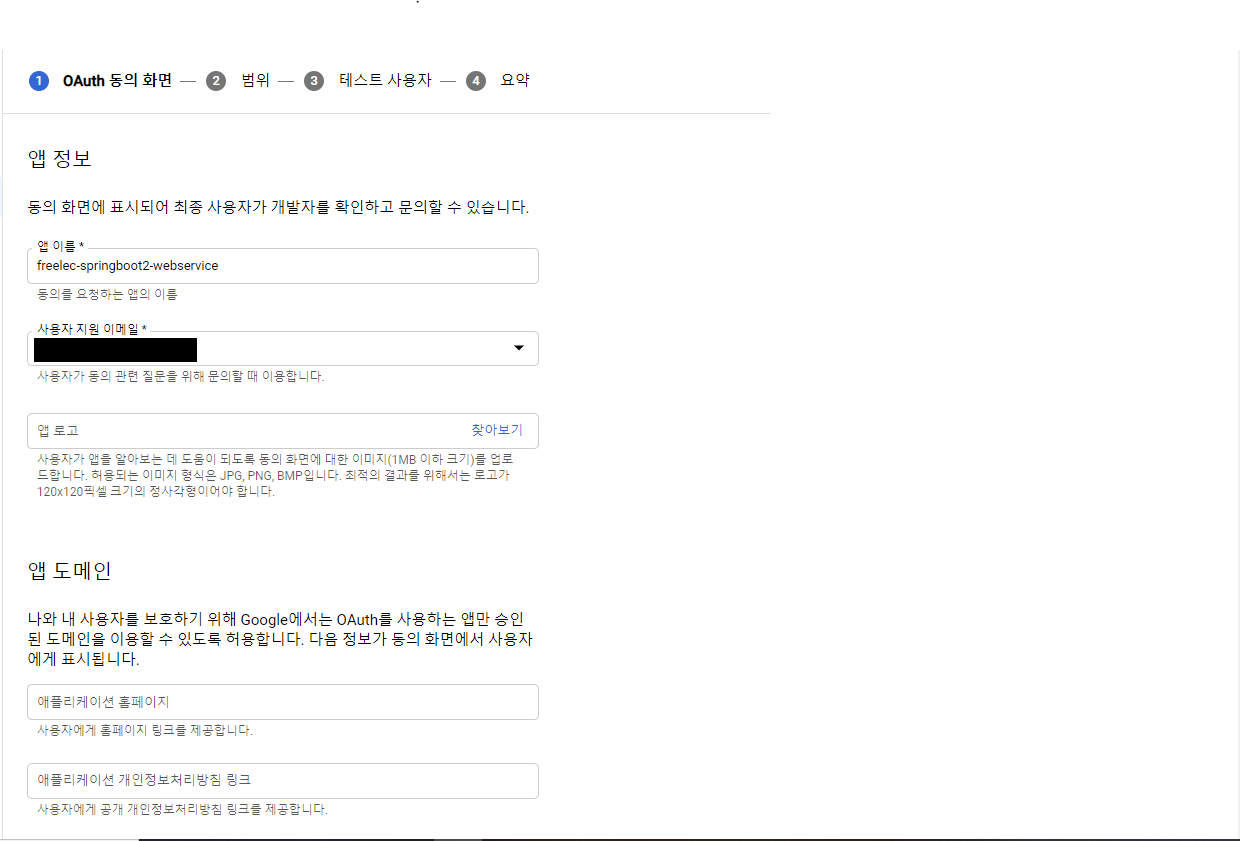
2. Oauth 클라이언트 동의화면 구성.

1) 좌측 OAuth 동의화면 메뉴 클릭
2) 앱이름,사용자 지원 이메일,개발자 연락처 정보 입력후 저장 후 계속 클릭.

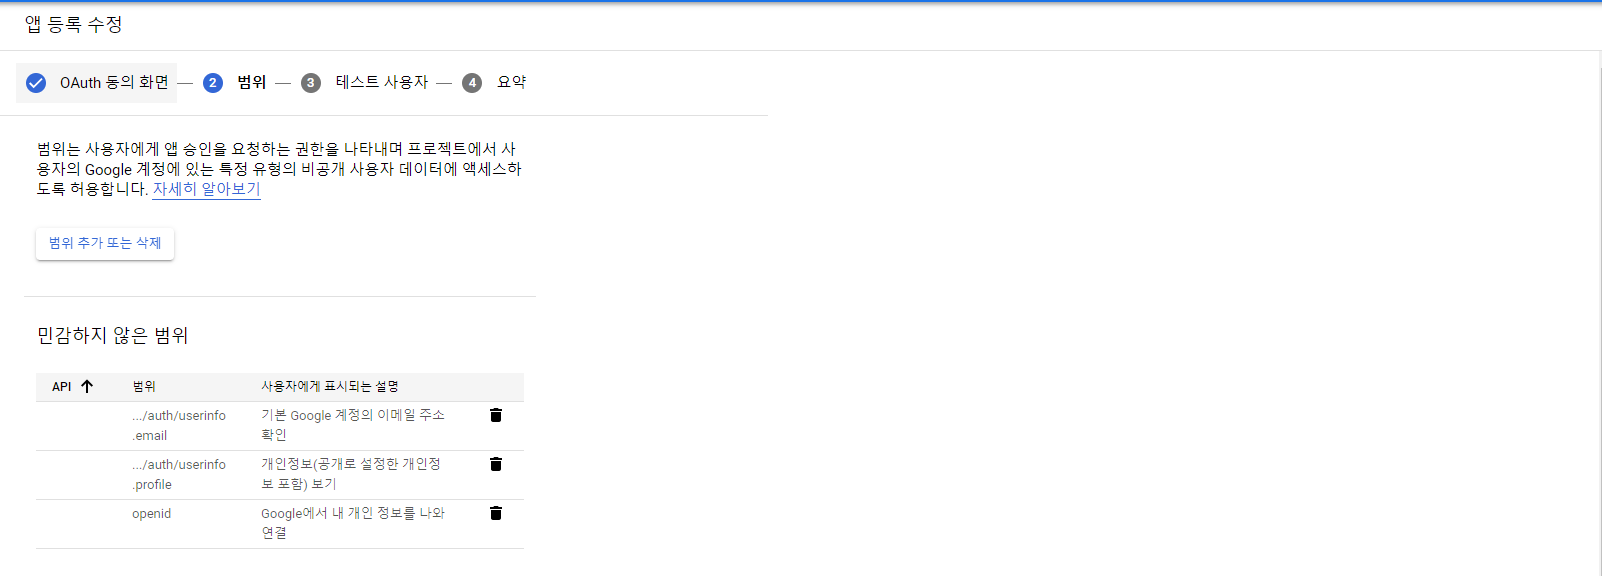
3) 범위 추가를 통해 profile,email,openid를 추가 시킨다.
4.OAuth 클라이언트 ID 만들기.

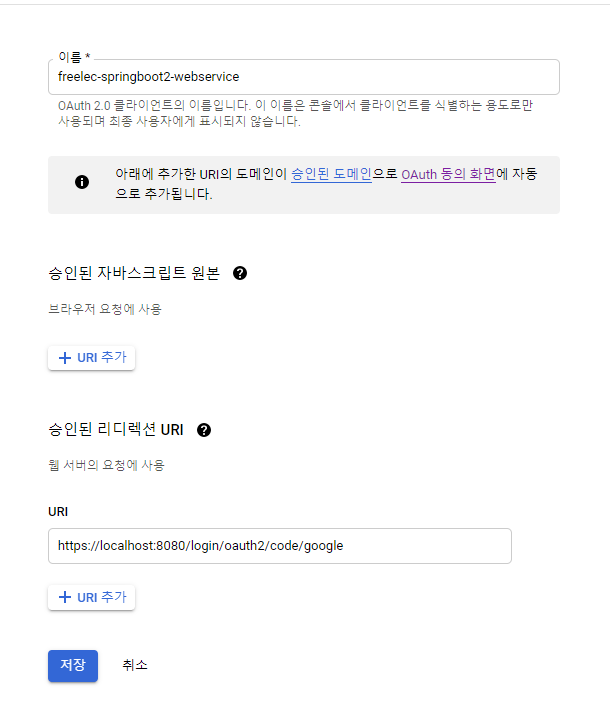
1) 사용자 인증정보를 클릭하고 oauth클라이언트 id 만들기 클릭
2) 클라이언트 이름과 사용할 리디렉션 url 설정.
5. properties파일 생성후 설정
1) application-oauth.propertiess 생성.

2) application-oauth.propertiess 설정.
spring.security.oauth2.client.registration.google.client-id=클라이언트 아이디
spring.security.oauth2.client.registration.google.client-secret=클라이언트 보안
spring.security.oauth2.client.registration.google.scope =profile,emial3) application.properties 속성 추가.
#application-oauth를 사용하게 함.
spring.profiles.include=oauuth
'spring > SpringBoot' 카테고리의 다른 글
| (Spring Boot) 테스트 코드 작성 방법 (1) | 2021.06.19 |
|---|---|
| (Spring Boot) @ResponseBody 동작 원리 (1) | 2021.06.18 |
| (프로젝트 진행) 스프링 부트로 게시글 조회 페이지 만들기. (0) | 2021.03.26 |
| (프로젝트 공부)스프링부트를 이용한 게시글 작성. (0) | 2021.03.19 |
| (프로젝트 진행)mustache레이아웃 나누기. (0) | 2021.03.19 |
